Vinyl siding is a plastic exterior cladding popular for being an affordable look-alike of stone or wood, and is very common across the United States. It is mainly made of PVC or polyvinyl chloride, but also contains some additives for better resistance. Being a homeowner with no relevant experience in vinyl siding installation can be hard. Hence, our team of experts at Vasa Roofing West Seattle LLC has created this guide to make this process hassle-free for you.
How Vinyl Siding Can Be Your House’s New Best Friend:
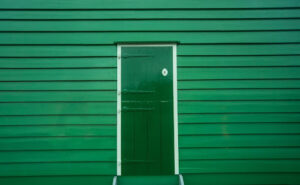
Vinyl siding comes in many styles and colors, allowing homeowners to get a custom-tailored look for their houses while making the most of its practical benefits. From cedar shakes and wood clapboard to stone, a vinyl siding installation can easily mimic the look of many expensive siding surfaces.
Let’s look at some other reasons why you should consider vinyl siding installation for your property:
- Apart from being available in a wide range of colors, vinyl sidings come with the guarantee of neither fading nor chipping.
- As compared to materials like aluminum or cedar, it is much more affordable.
- A professional vinyl siding installation can last you for years to come with proper maintenance.
- Your house’s thermal performance can be enhanced with insulated vinyl siding.
- It is a very low-maintenance material and doesn’t need staining or painting like regular wood siding.
Weathering The Elements With Hassle-Free Vinyl Siding Installation In 6 Steps:
Now that you know about the long list of benefits a vinyl siding holds, you should also know that DIYing a vinyl siding installation can save you money. But a lot of things can go sideways without the right level of expertise. However, if you still feel like tackling this project yourself, our installation guide can be quite helpful for you.
Here is our expert guide on vinyl siding installation in 6 steps:
a. From the old drab to a new fab:
The first step in the vinyl siding installation process is to remove the old material from your house and make sure there are no chances of multiple layers underneath the existing vinyl. Removing the old vinyl siding panels can be easily done with a zip tool, commonly used for unhooking.
b. Sheathing & flashing to step up your curb appeal:
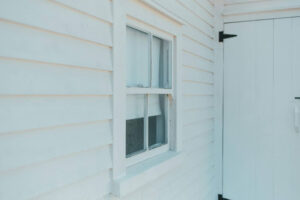
After the old panels are removed, it is time to attach the sheathing, which offers a smooth surface along with the added benefit of insulation if you choose a foam plastic option rather than OSB or plywood. But remember not to attach the siding directly to the studs. Now that the sheathing has been attached, you’ll be adding a layer of flashing (a water-resistant barrier) around the windows, doors, and corner posts.
c. Level your starter strip for a siding that lasts:
To install the starter strip, first level it to ensure that all other components installed above it are in the correct position, and then nail it to the bottom wall. The vinyl siding will be installed on one of the pieces that stick out from it. It is suggested to start strong by snapping a level line around your property and then hanging more siding panels as you go along while cross-checking your progress.
| Pro tip:
To avoid realizing halfway that your siding project is not level, use a laser level if your starting point seems wonky by marking the spots indicated by the laser and then nailing the starter strip. |
d. Strong siding with the right corners:
Now, install the inside corner pieces by extending 3/4 of an inch past the bottom of the starter strip point. Ask a friend to hold it tight and nail each side while spacing out the nails every 12-14 inches. Repeat these exact steps for installing the outside corner trim pieces.
e. Vinyl siding panels to protect your investment:
In the fifth step, you’re going to install your very first siding panel after cutting it to the right size. It is suggested to cut it short enough to leave some room at the ends for contractions and expansions during changing seasons. Another thing to remember here is to leave a 1/32-inch gap between the wall and nail head. Install all the other panels from top to bottom while ensuring that each panel clips to the one under it.
f. Wrap it up with the J-trim:
The J-trim or J-channel is first measured by being placed and marked against the windows or doors. For the sides, you can ask a buddy to hold the trim while you nail it end-to-end to keep it up. Your nails should be spaced out by 12 inches in this step, too. Also, remember to make a 3/4-inch cut on both ends when attaching the J-trim. Place the piece above the windows or doors and fit it into the J-trim on all sides. Lastly, nail the J-trim on top just like all the other pieces were nailed.
Conclusion:
Vinyl siding has many advantages, like weather resistance and a budget-friendly cost, but for most homeowners, vinyl siding installation can seem like a very daunting task when you don’t know what to do. However, our expert guide with a 6-step installation process makes the task easy, even for beginners.
FAQs:
What is the most common mistake when installing vinyl siding?
Not leaving enough room for overlap between the panels is a very common mistake.
How deep is vinyl siding?
While most vinyl siding is supposed to be 0.035 inches thick or deep, the more durable options are usually 0.04 inches thick.
Can you sand vinyl siding?
Yes, but you first need to make sure that the siding can withstand the sanding.
What should you put under vinyl siding?
Experts recommend adding a weather-resistant material under the panels.
Can I put vinyl siding over wood?
Yes, you can easily apply it over wood siding.