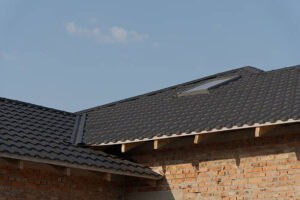
If you want to bring more natural light into your home, skylight installation is the perfect solution. At Vasa Roofing West Seattle LLC, we understand the needs of homeowners and provide tailored solutions to provide both functionality and aesthetics to your home. A well-installed skylight is not just about providing light to a dark room; it’s about proper ventilation, boosting home value, and helping to reduce energy bills. In this blog, we will explore the step-by-step guide to installing a skylight, so you have complete knowledge before starting this project.
The Path to Natural Light: A Practical Guide to Installing a Skylight
A skylight installation might seem to be a difficult task, but with the right tools, planning, and techniques, it is achievable.
Here is the step-by-step guide to skylight installation that you can follow for a perfect skylight installation.
Gather all the tools and materials needed
Before starting, gather all the tools and materials that you will need for the skylight installation process. Below is the list of all:
| Tools | Materials | Safety gears |
|
|
|
-
Plan the Placement
Before starting, plan where you want to install a skylight. Ideally, it should be installed where the roof receives direct sunlight for some hours in a day. Avoid areas near chimneys, trees, or taller buildings. Also, make sure that the room where you want to install a skylight has the right roof slope to adjust the skylight.

-
Choose the Skylight
There are different types of skylights available in the market. Pick the right one according to your space.
- Fixed Skylights: Allow light to enter, but they don’t open. It is good for hallways, stairwells, and attics.
- Vented Skylights: They can be opened manually or electronically to provide fresh air. They are ideal for kitchens and bathrooms.
- Tubular Skylights: Perfect for smaller rooms where a traditional skylight won’t fit.
-
Cut the Opening
To install a skylight, cut the opening into your roof. First, mark the location of the skylight on your ceiling, then drill a hole through the ceiling and roof for reference. With the help of a chalk, outline the opening based on your skylight dimensions. Then carefully cut through shingles and roof sheathing with a circular saw.
-
Install the Skylight
Once you cut the opening, here comes the main part: installing the skylight. Frame the opening by adding headers and trimmers between roof rafters to support the skylight. They place the skylight into the framed opening. Secure it with the help of nails or screws. To prevent leaks, install the flashing kit around the skylight. Finally, seal around the skylight with roofing sealant for extra protection.
-
Reinstall Missing Roofing Material
Once the skylight is installed, replace the shingles around the skylight. Cut them properly to snugly fit around the flashing. Ensure that there are no gaps between, where water could seep in.
-
Finish Interior Work
Once the skylight is completely sealed on the roof, it’s time for interior finishing. Apply drywall or plasterboard around the skylight well. Insulate around the opening to save energy. In the end, paint ot trim for final finishing.
Common Mistakes to Avoid During Skylight Installation
Here are some common mistakes that you should avoid while installing your skylight:
- Ignoring Roof Slope: Installing a skylight on a flat roof or the wrong sloped roof can cause a pooling water problem on your roof.
- Skipping Flashing: Improper flashing is the main cause of skylight leaks. Without proper flashing, leaks can not be avoided.
- Wrong Placement: Installing a skylight in the wrong place, like under shaded areas, reduces energy efficiency and does not serve the purpose.
- Neglecting Safety: Roof work can be dangerous; always use proper protective gear while skylight.
- DIY Beyond Limits: If your roof has a complicated framing or you’re unsure how to properly install a skylight. It is best advised to hire the professionals.
Conclusion
Skylight installation is the most effective and energy-efficient way to brighten up your home. It helps to improve ventilation and value to your property. With the right planning, precision, and safety precautions, you can easily install a skylight. Whether you select a fixed, vented, or tubular skylight for your space, it will create a more inviting space and transform the atmosphere of your home.
FAQs
How long does it take to install a skylight?
Professional skylight installation typically takes one to two days, while DIY installation may take longer depending on experience.
How much does skylight installation cost?
The cost ranges between $1,000 and $2,800, depending on the size, material, and complexity of the installation process.
Can I install a skylight myself?
Skylight installation is a roof job that is best left to professionals until you have some experience.
